I have finally decided, after a long discussion with Hannah, that in order to build a kiln I may have to put together some forms and make my own bricks. Talk about starting from scratch ...
- Posted using BlogPress from my iPhone
Thursday, April 26, 2012
Tuesday, April 24, 2012
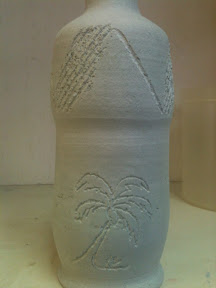
Bold Decor
I figured that a large pot needed bold decor.
So I started with a wide triple line all the way around the top and bottom edges,
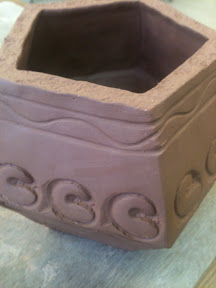
followed with a nice large swirl design, repeated above and below the center line.
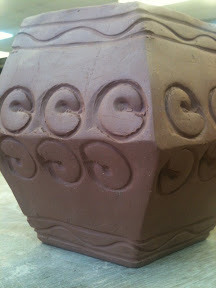
Next I decided on something a little more subtle along the top lip.
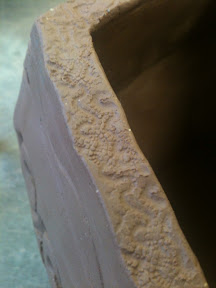
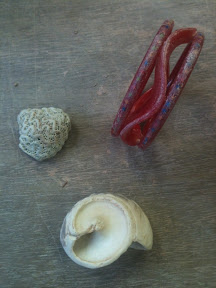
It's amazing what you can do with three little girl's bracelets glued together, a broken shell, and a piece of worn coral found in a gravel pile.
Enjoy! And Happy Mudding!
- Posted using BlogPress from my iPhone
So I started with a wide triple line all the way around the top and bottom edges,
followed with a nice large swirl design, repeated above and below the center line.
Next I decided on something a little more subtle along the top lip.
It's amazing what you can do with three little girl's bracelets glued together, a broken shell, and a piece of worn coral found in a gravel pile.
Enjoy! And Happy Mudding!
- Posted using BlogPress from my iPhone
Monday, April 23, 2012
I Think it's time ...
I have been thinking this last few months about starting a new blog just for TropiClay Studio. This would leave the current blog just for the classes I teach, with just student work displayed. I realize that would mean another blog to follow ( for those of you who follow now), but would give me a more professional venue for my work to stand alone. Any and all
comments, feelings, etc., on this move would be appreciated.
Thanks,
Robert
- Posted using BlogPress from my iPhone
comments, feelings, etc., on this move would be appreciated.
Thanks,
Robert
- Posted using BlogPress from my iPhone
Friday, April 20, 2012
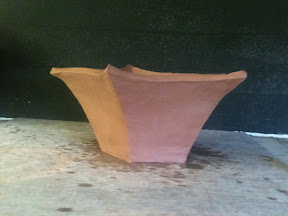
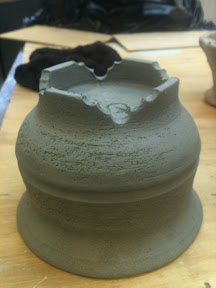
Another new form ...
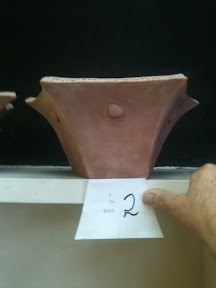
I kinda like this one:


but this evening it dawned on me that this would be a great starter form for a teapot! (smaller in size though) This one is about 6-7 inches high, and about 7 lbs.
-Posted using BlogPress from my iPhone
but this evening it dawned on me that this would be a great starter form for a teapot! (smaller in size though) This one is about 6-7 inches high, and about 7 lbs.
-Posted using BlogPress from my iPhone
Thursday, April 19, 2012
Templates
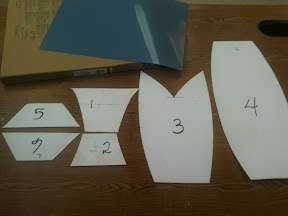
I started thinking yesterday about making more templates for some new pieces, new forms. So I pulled out the posters, and proceeded to come up with things I thought might work.
Like putting a base on this form to make it more like a punch bowl or centerpiece for the table.
I finished cutting out several forms
when a neighbor came by with a box of undeveloped X-ray film! He said I could have their whole remaining stock of undeveloped film from the hospital if I want, as they have gone completely digital with their imaging. What a find! I can cut out stencils, OR templates!
I have decided to number the templates to keep track of which one works with the others. For instance, I originally cut the #5 template as a base for the punch bowl idea, but the angles are too sharp, and it won't stand up by itself. So I cut #2 instead.(which works much better). Numbers 5 & 6 will work great with 4 sides, but not with 5 sides. Etc., etc., etc.
Have a good day!
- Posted using BlogPress from my iPhone
Wednesday, April 18, 2012
Two Down ... ? To Go
Finished the second one today with a shell theme.
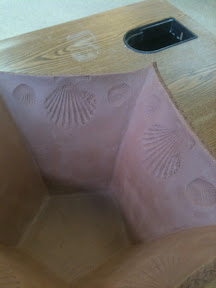


Can't wait to get these fired and sold! Don't know how many I will make.

- Posted using BlogPress from my iPhone
Can't wait to get these fired and sold! Don't know how many I will make.
- Posted using BlogPress from my iPhone
Tuesday, April 17, 2012
Round Two!
Had so much fun with the last one, I decided to make more!


Several teachers want one already...so I'll make a half dozen or so.
- Posted using BlogPress from my iPhone
Several teachers want one already...so I'll make a half dozen or so.
- Posted using BlogPress from my iPhone
Monday, April 16, 2012


Friday, April 13, 2012
Fun lunchtime activity!
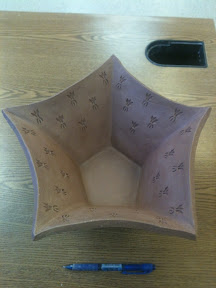
Start with about 8 lbs of terra cotta clay, add one template cut from a heavy poster stock.
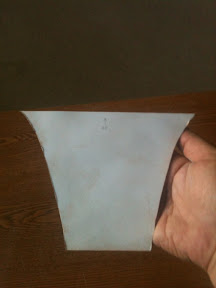
Roll out a half inch thick slab, use the template to cut a few pieces
( the number here is up to you), and scratch and slip them together. Let them firm up while you smooth them out and shape them.
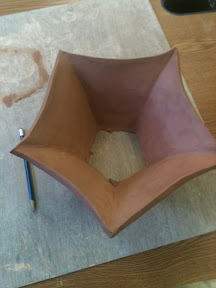
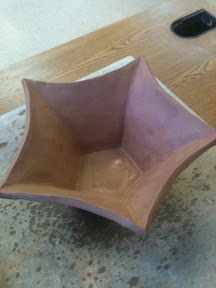
Roll another smaller slab, set the firm form on it to mark your bottom, then scratch and slip again, smoothing the bottom to the sides. Ta-da! A nice serving bowl/flowerpot/conversation piece! About 9" on a side ( point-to-point), and about 6-7" tall.
Someone at school asked me to post on how to do this...
I'm thinking of stamping the inside rim (about a 1.5" band) all the way 'round.
-Posted using BlogPress from my iPhone
Roll out a half inch thick slab, use the template to cut a few pieces
( the number here is up to you), and scratch and slip them together. Let them firm up while you smooth them out and shape them.
Roll another smaller slab, set the firm form on it to mark your bottom, then scratch and slip again, smoothing the bottom to the sides. Ta-da! A nice serving bowl/flowerpot/conversation piece! About 9" on a side ( point-to-point), and about 6-7" tall.
Someone at school asked me to post on how to do this...
I'm thinking of stamping the inside rim (about a 1.5" band) all the way 'round.
-Posted using BlogPress from my iPhone
Tuesday, April 10, 2012
Wedding Jug
Just a quick video of the finished product ... well ... almost - still needs glaze!
-Posted using BlogPress from my iPhone
-Posted using BlogPress from my iPhone
Monday, April 9, 2012
Finished!
Finally finished trimming all the pieces...


and did a little decorating.
Love this little button I bought in California last summer, it does a nice impression.


Just got this thing about feet!
Here's the overall look. It will look sooo much better glazed...
Enjoy your day!

-Posted using BlogPress from my iPhone
and did a little decorating.
Love this little button I bought in California last summer, it does a nice impression.
Just got this thing about feet!
Here's the overall look. It will look sooo much better glazed...
Enjoy your day!
-Posted using BlogPress from my iPhone
Wednesday, April 4, 2012
From chuck to what?
Managed to trim the bottle (most of it any way), thought about using the cheese slicer on the upper half.
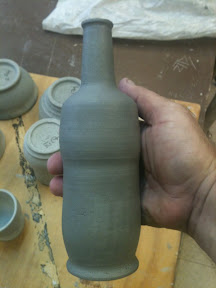
Then I wanted to do something productive with the chuck - couldn't see wasting that 7-8 lb column - so I tried something I've never managed before. I came up with my biggest piece ever.
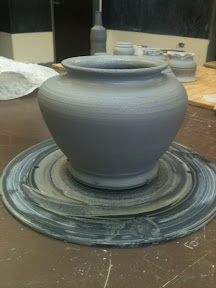
Now to get this one trimmed...
- Posted using BlogPress from my iPhone
Then I wanted to do something productive with the chuck - couldn't see wasting that 7-8 lb column - so I tried something I've never managed before. I came up with my biggest piece ever.
Now to get this one trimmed...
- Posted using BlogPress from my iPhone
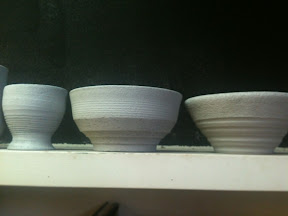
Trimming
Well ... trimmed some yesterday, tried a more decorative approach with several, but dreading the trimming of the bottle today. I've used a chuck once or twice, but never had to make one for my work. I will get some pics up later, but here's a couple of bowls to hold you over.

- Posted using BlogPress from my iPhone
- Posted using BlogPress from my iPhone
Subscribe to:
Posts (Atom)